Mac
Install unixODBC
Install unixODBC by following the instruction.Install Oracle Instant Client packages
Visit Oracle’s official website and download the Instant Client packages compatible with your macOS architecture (either ARM64 or Intel x86). Download the Basic and ODBC packages.- Oracle Instant Client Downloads for macOS (ARM64)
- Oracle Instant Client Downloads for macOS (Intel x86)
~/instantclient_23_3.
Configure ODBC drivers
The commands below assume Homebrew is installed in/opt/homebrew. Run brew --prefix first to check, and use your own path both in the registration command and in the symbolic link.
Run the provided script to update the odbcinst.ini file.
odbcinst.ini file has been updated with the Oracle ODBC driver information.
Create a symbolic link to libodbcinst.2.dylib
Create the following symbolic link so that the Oracle ODBC driver works with unixODBC. This assumes thatlibodbcinst.2.dylib is located in /opt/homebrew/lib.
Set environment variables
Add the following lines to your shell configuration file (for example,~/.zshrc or ~/.bash_profile).
Create a database connection
-
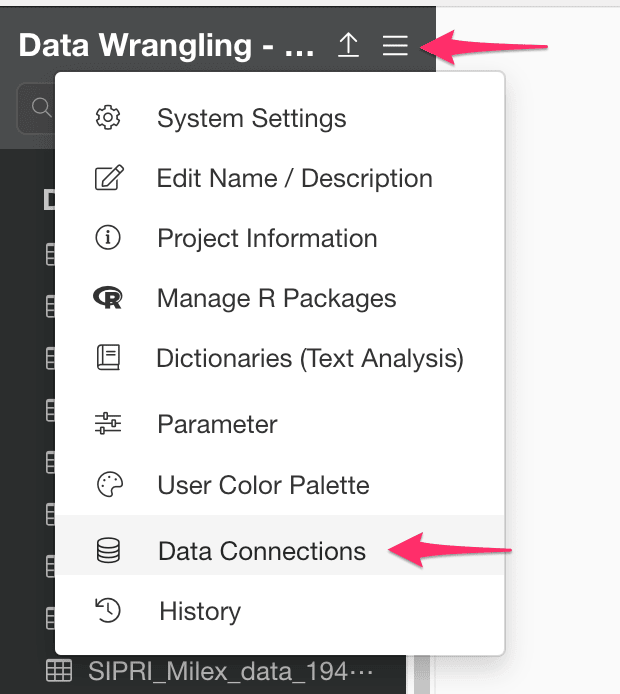
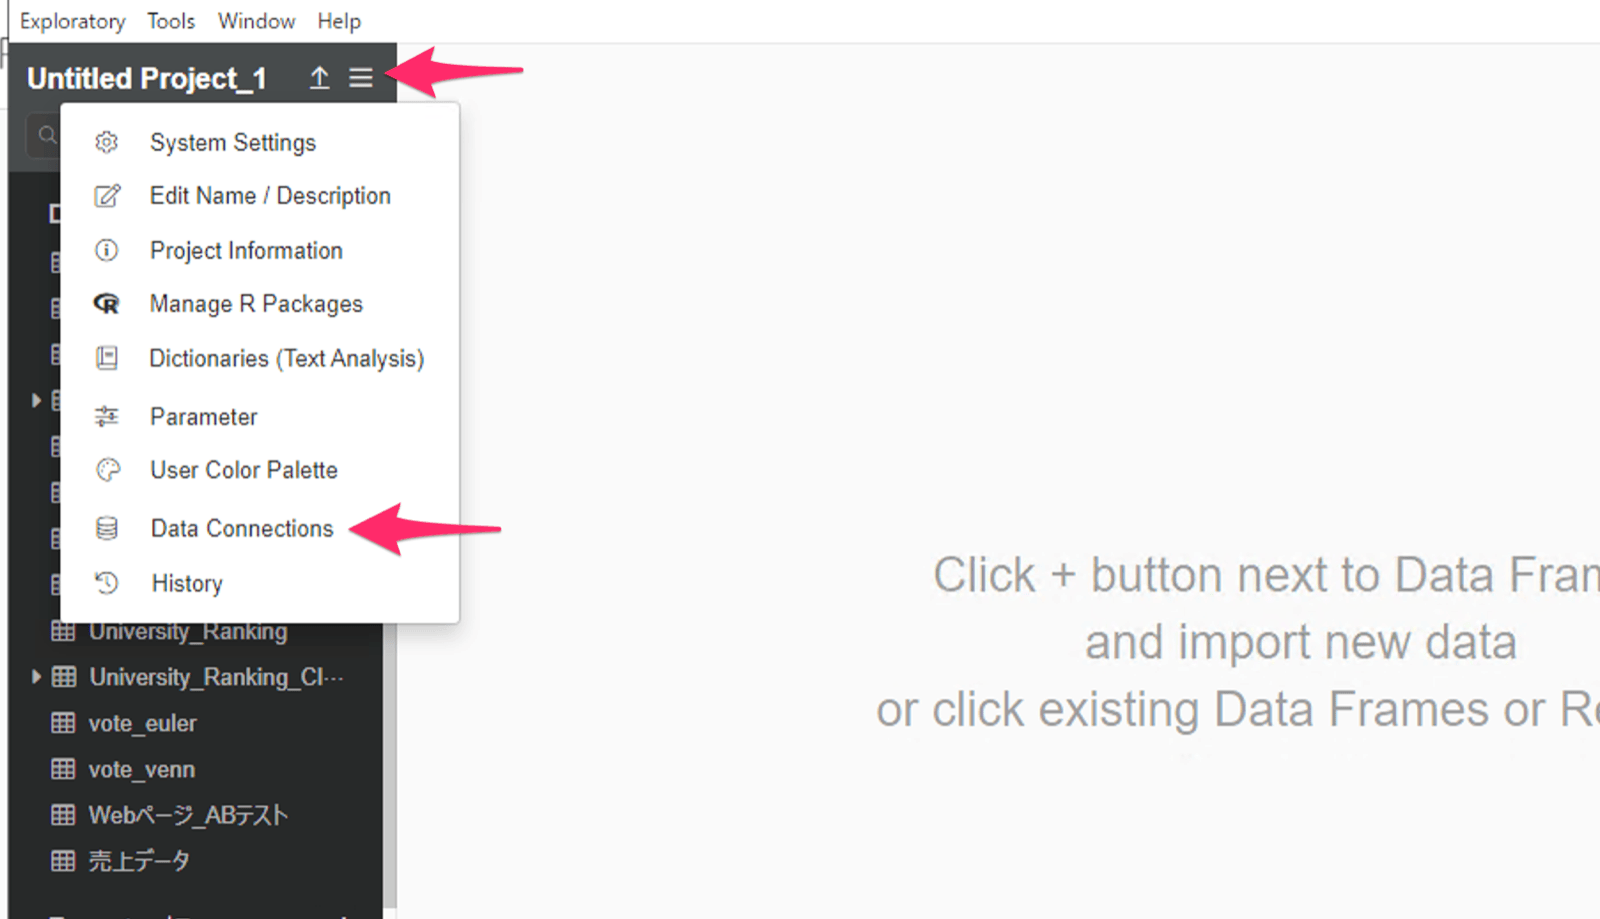
From the 3 bars menu, select Data Connections.
-
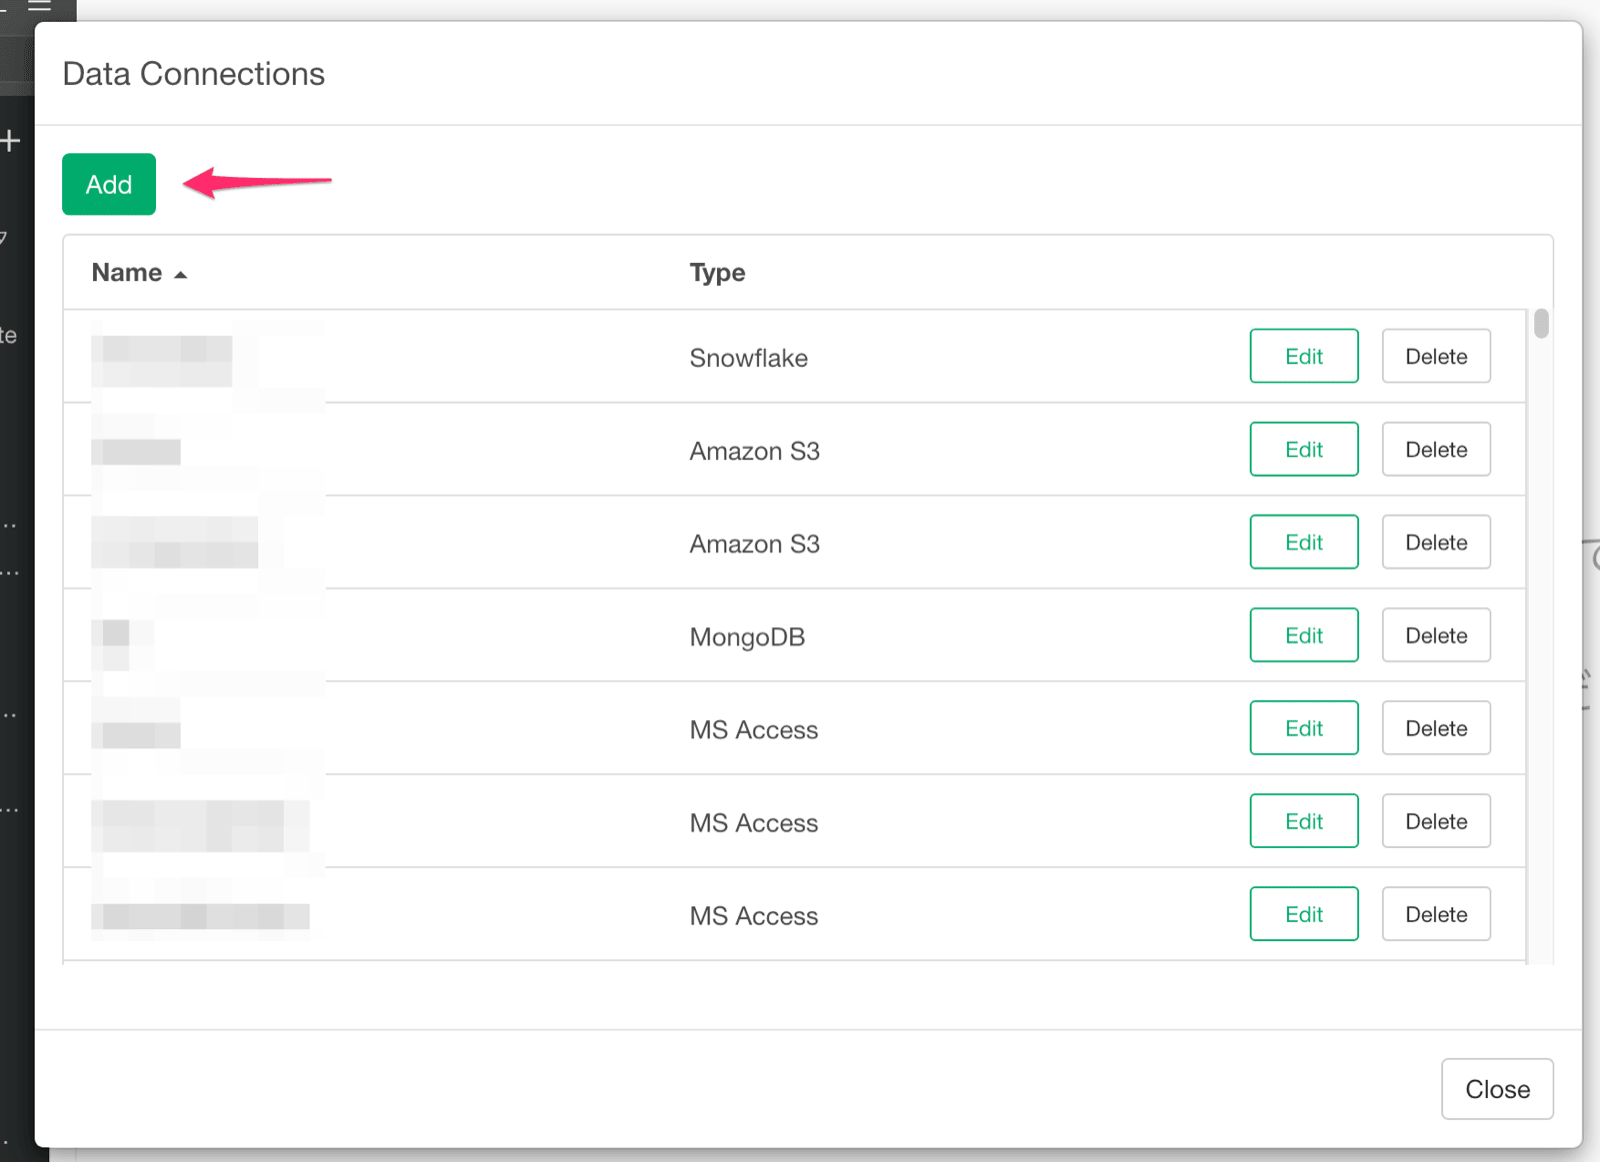
Click the Add button.
-
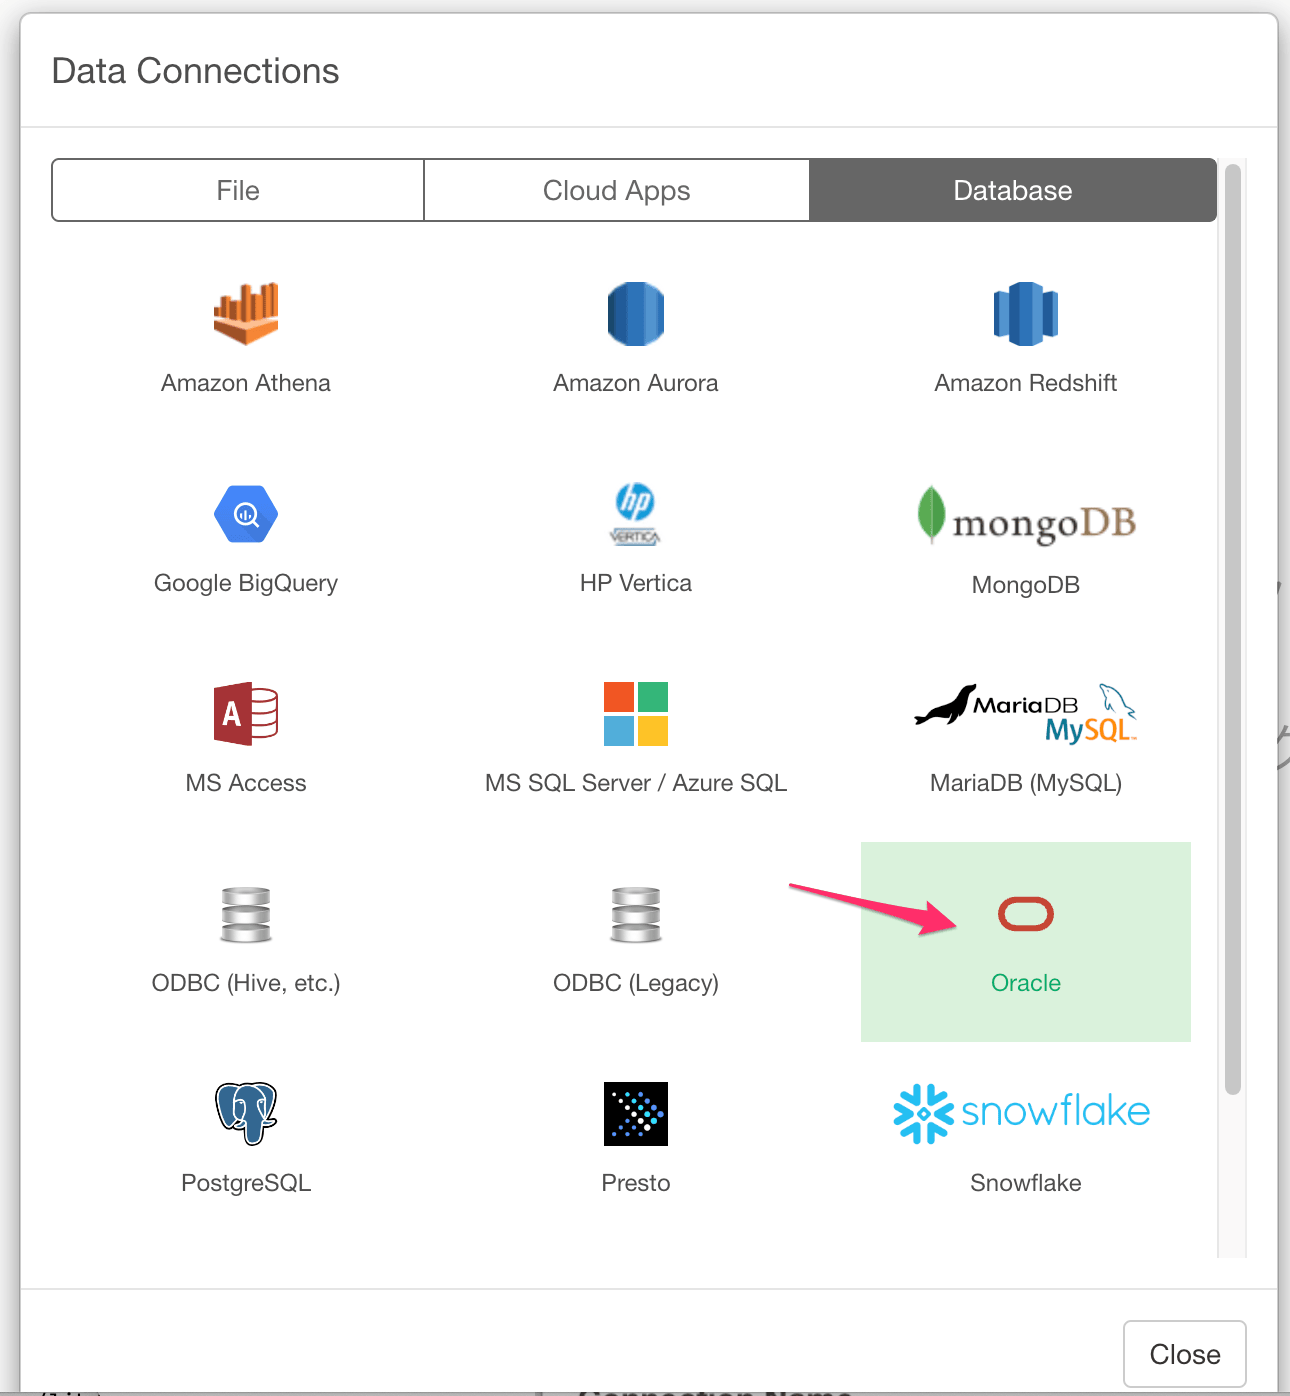
Select the Database tab and then click the “Oracle” icon.
-
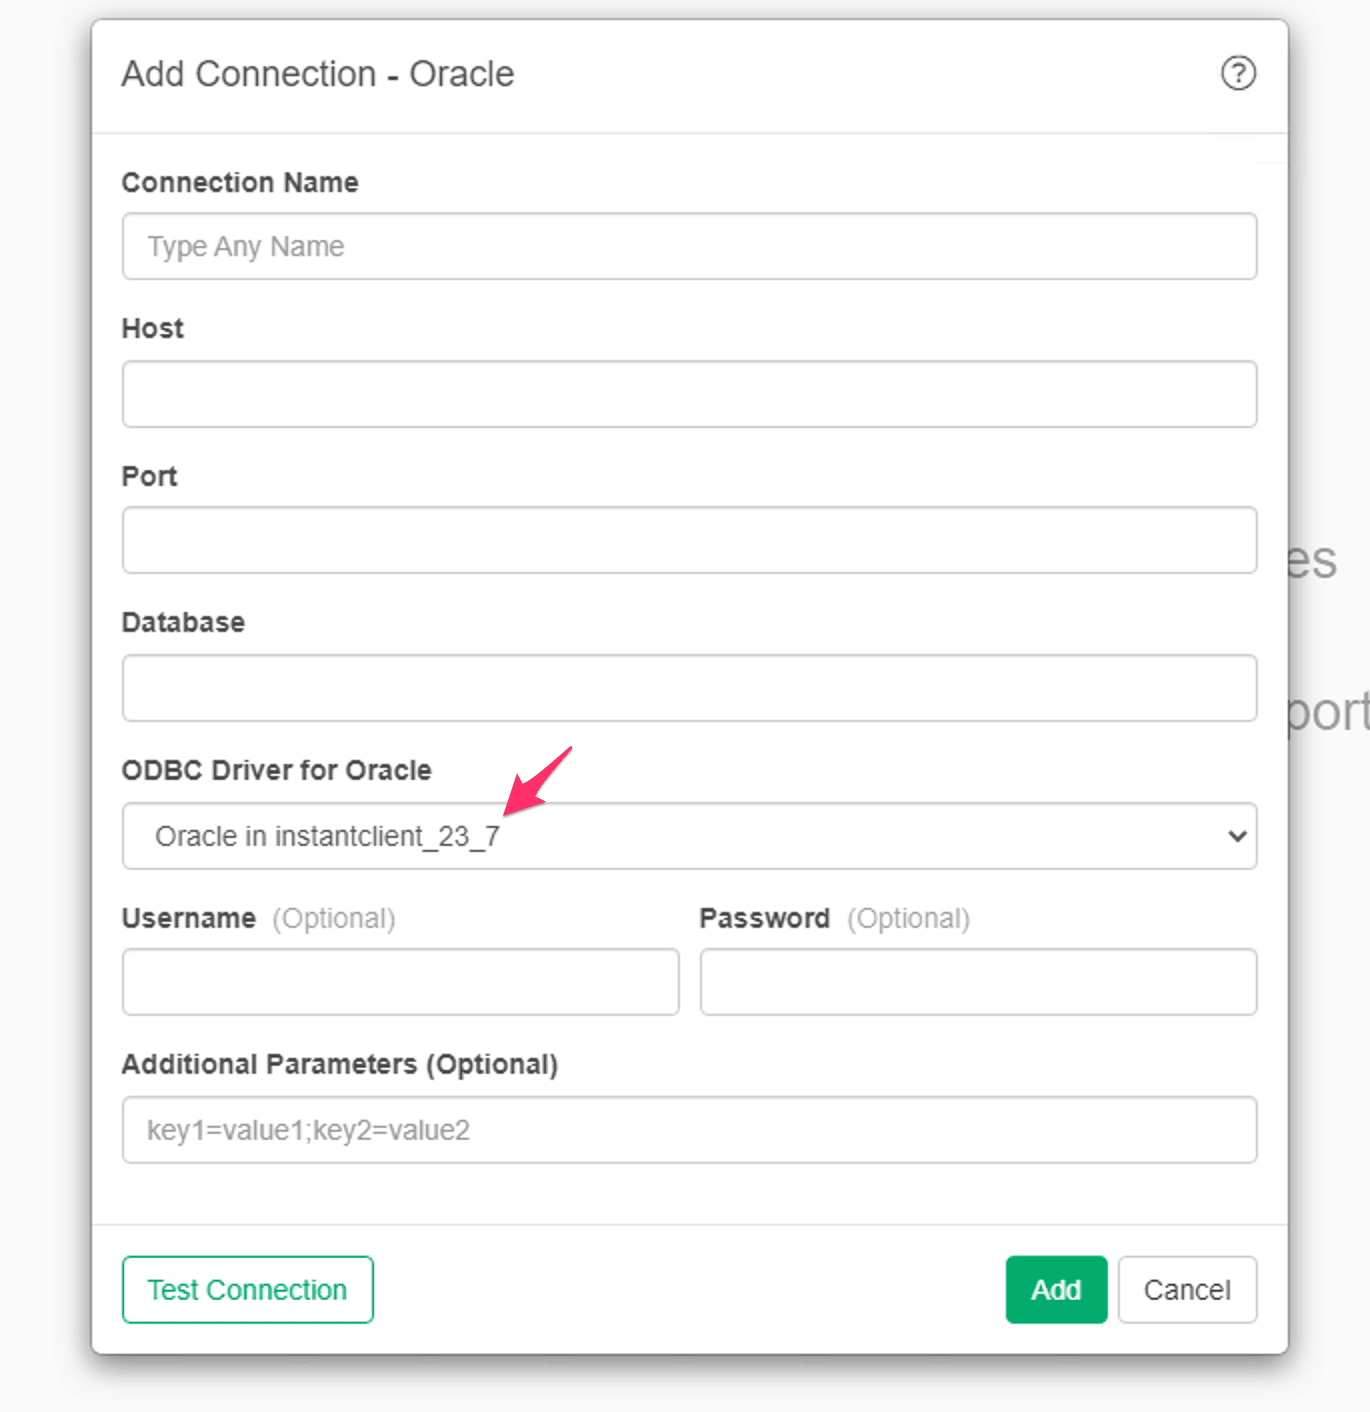
Enter the required information and select the Oracle 23 ODBC driver that you just installed.
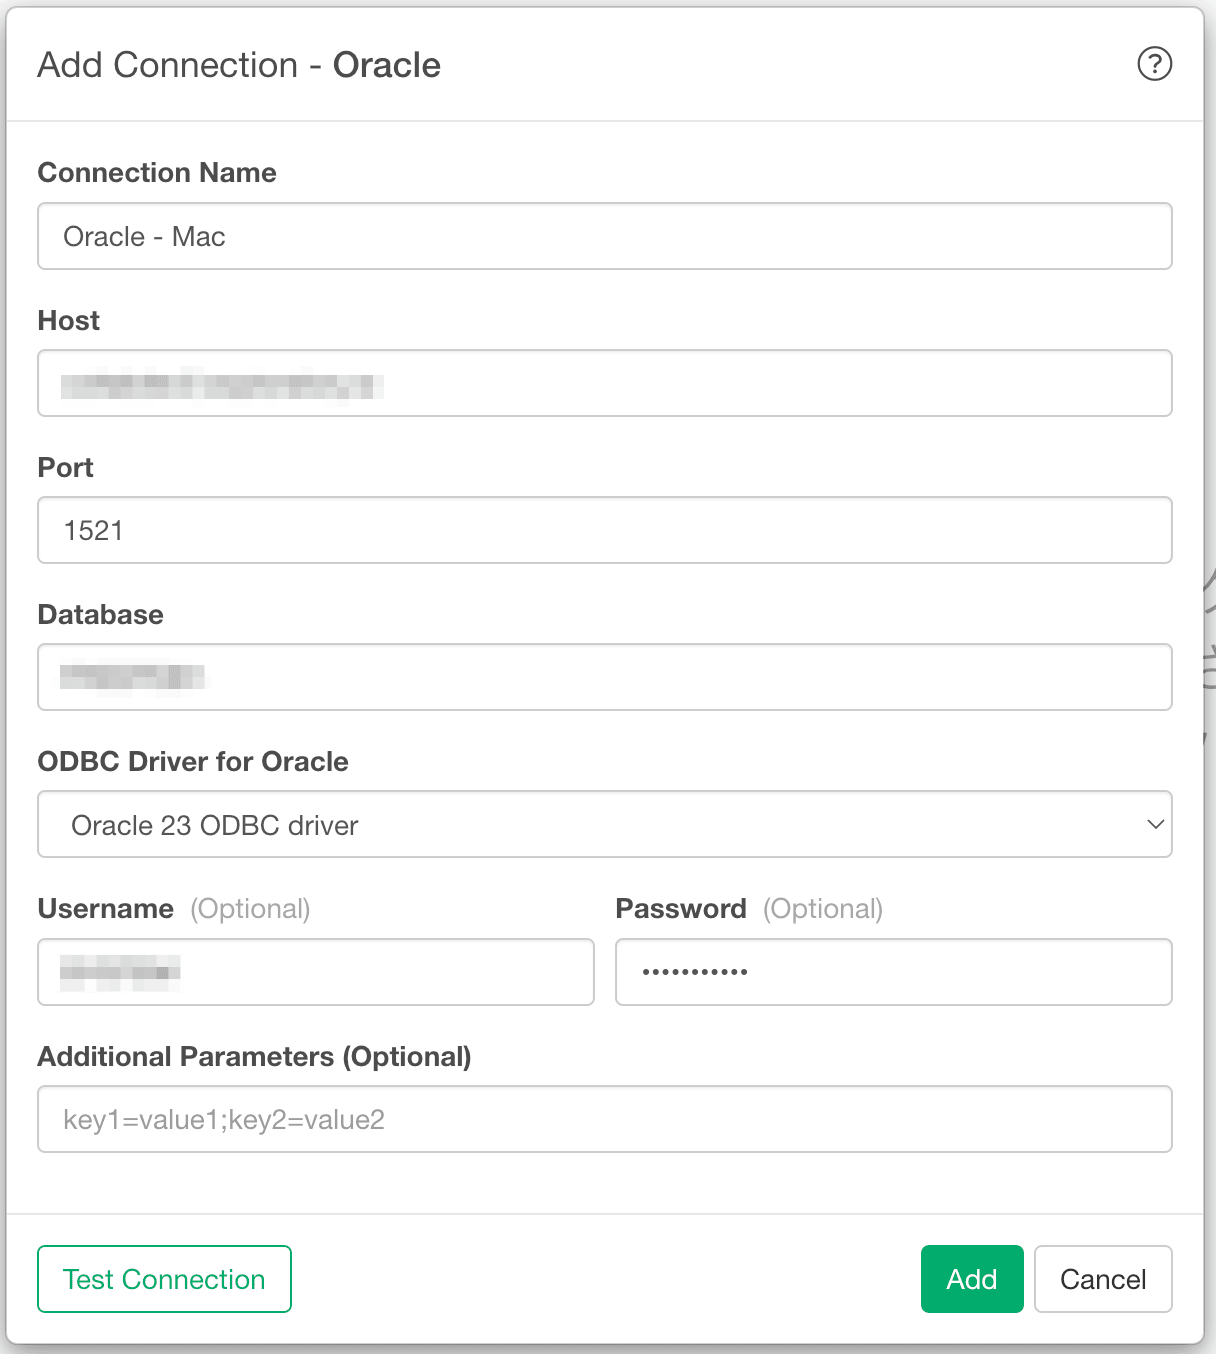
-
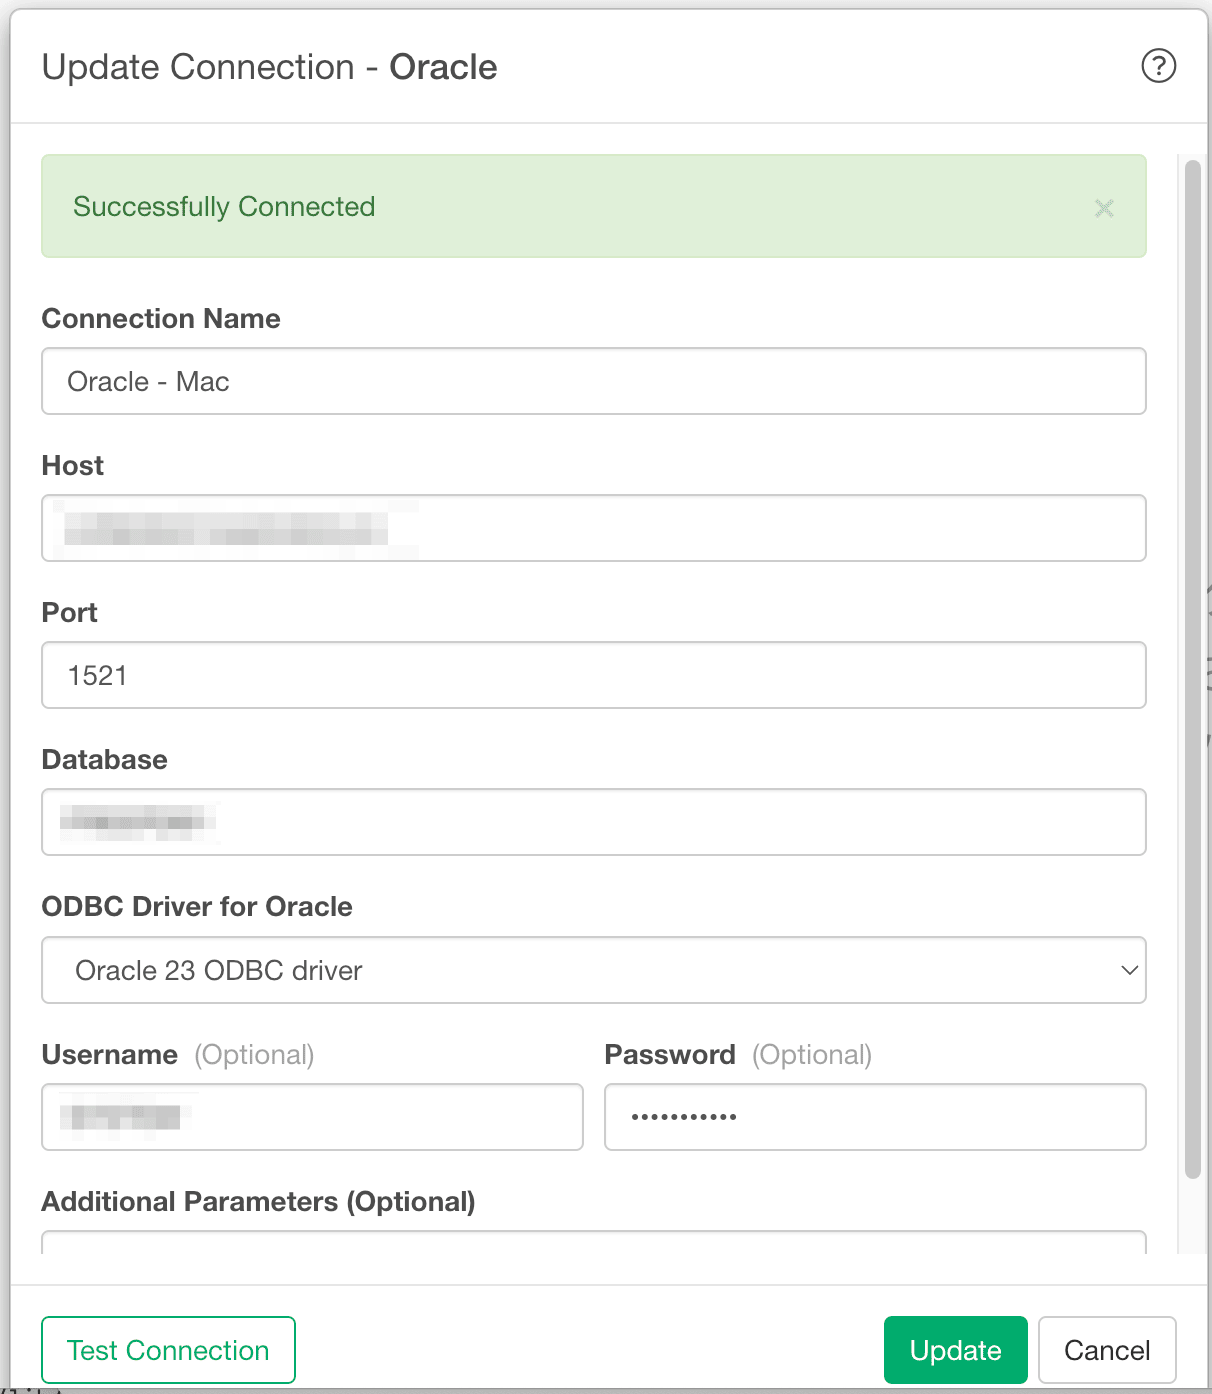
Click the Test Connection button and make sure it works, then click the Add button to save the connection.
Windows
1. Install Microsoft Visual C++ Redistributable
Oracle’s Instant Client requires the Microsoft Visual C++ Redistributable. If you haven’t installed it yet, download the installer from this link and run it. For more details, see Latest Microsoft Visual C++ Redistributable Version.2. Install Oracle Instant Client
Visit the Oracle Instant Client Downloads for Microsoft Windows (x64) 64-bit page (registration required). Multiple driver versions are available. Choose the version certified for your Oracle Database and download the following two packages:- Basic package
- ODBC package
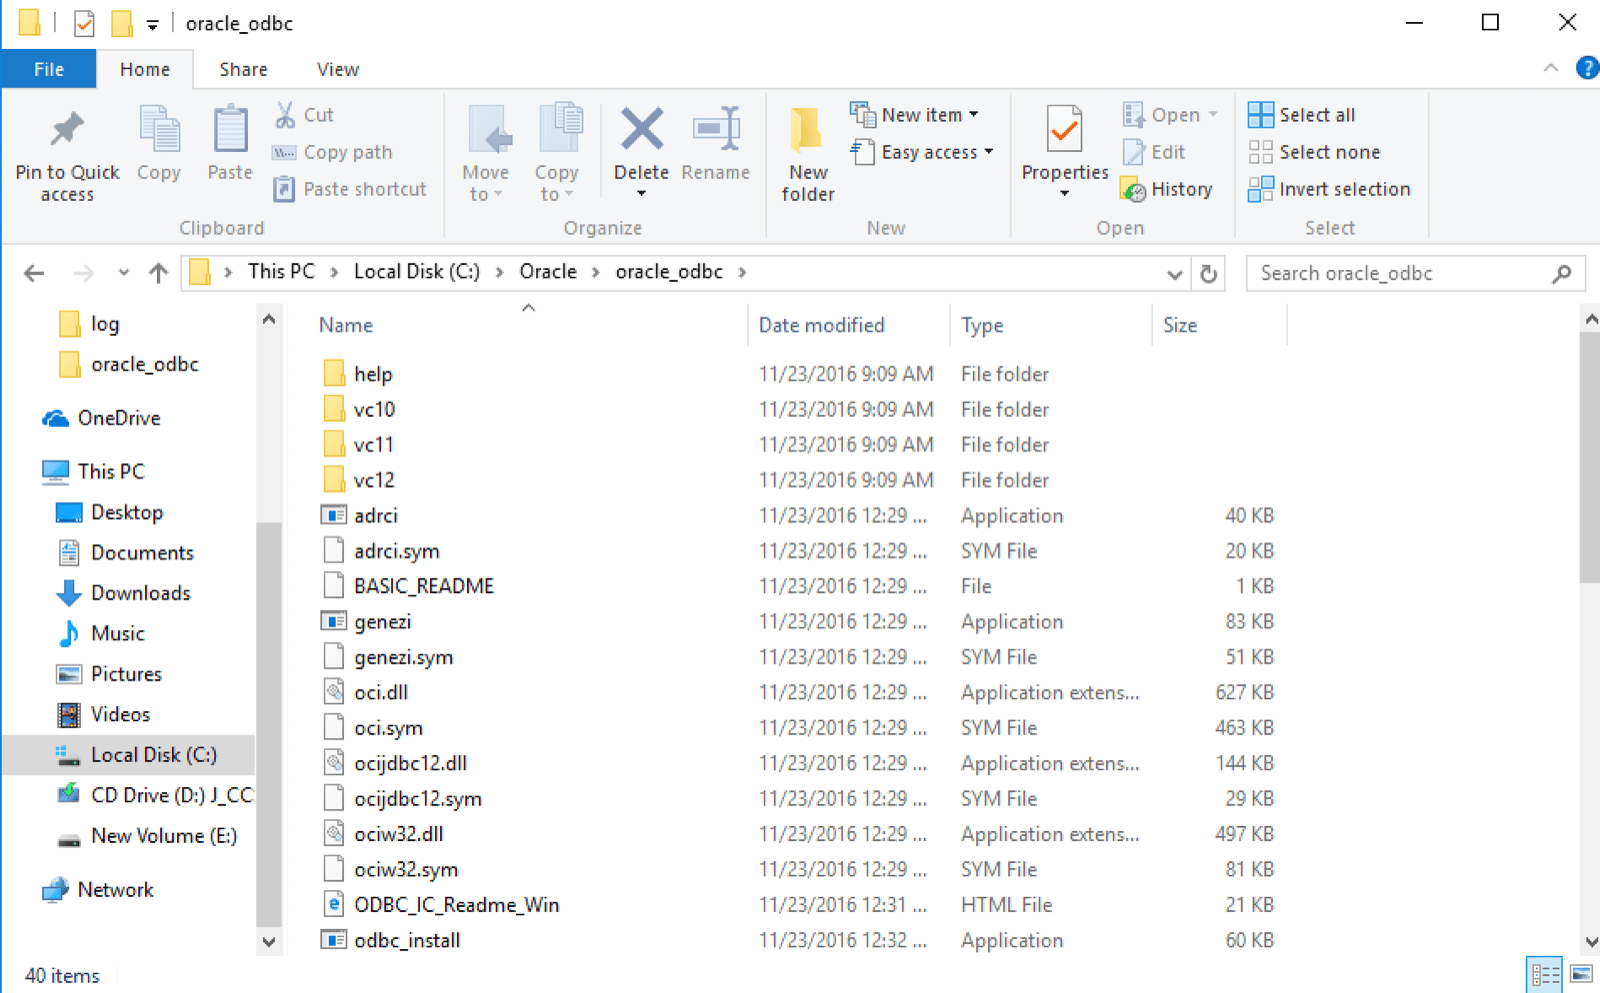
C:/Oracle/oracle_odbc. You should see the files from both zip files in this directory.
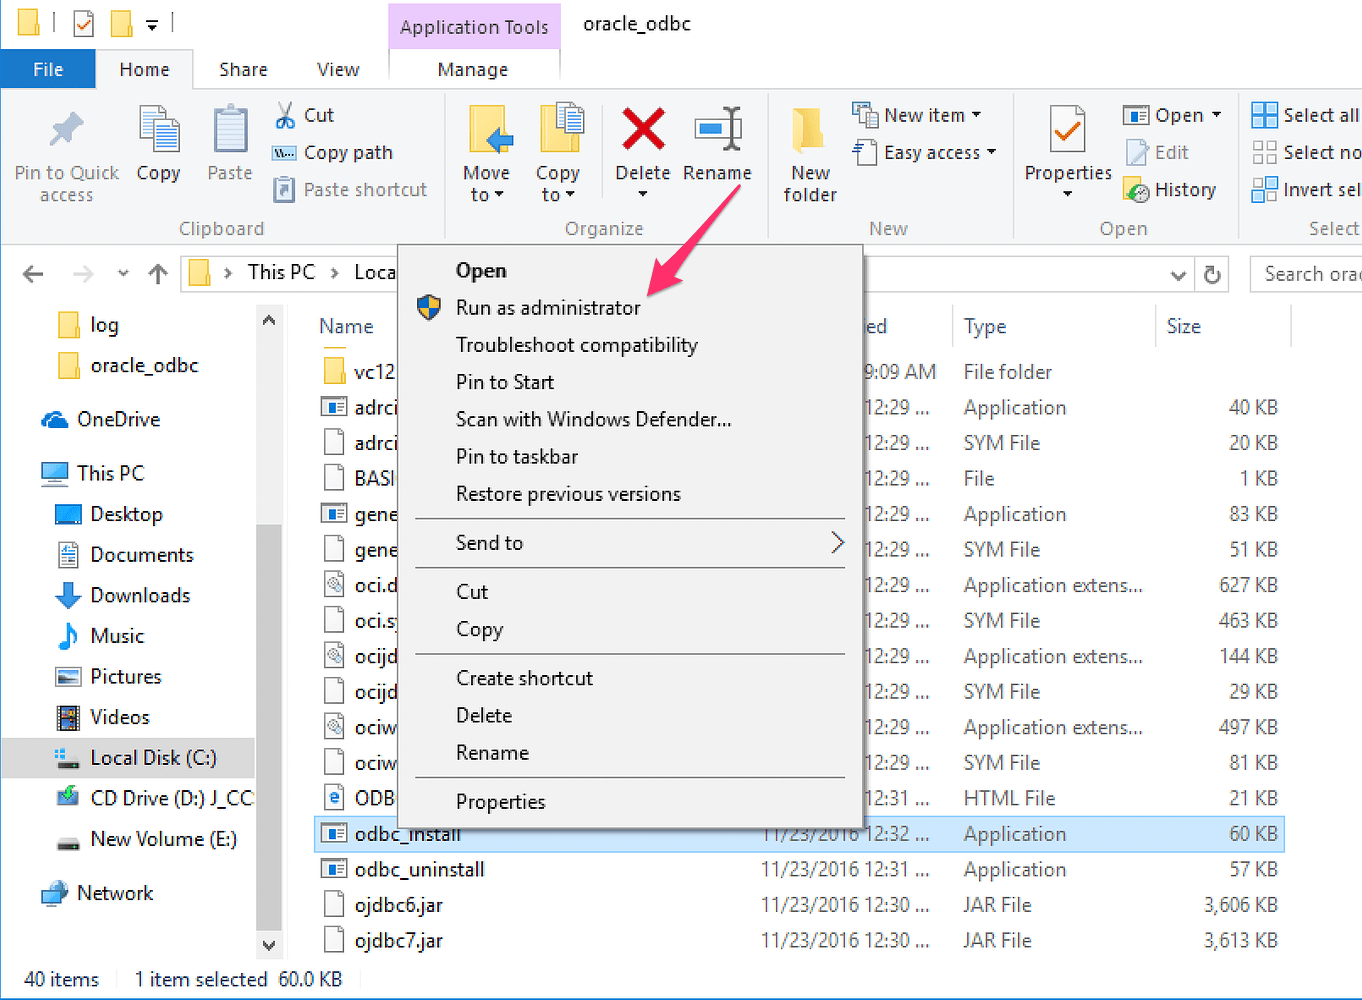
odbc_install.exe as Administrator by right-clicking it and selecting Run as Administrator.
3. Set environment variables
Set up two environment variables that point to the Oracle Instant Client installation directory (for example,C:/Oracle/oracle_odbc).
-
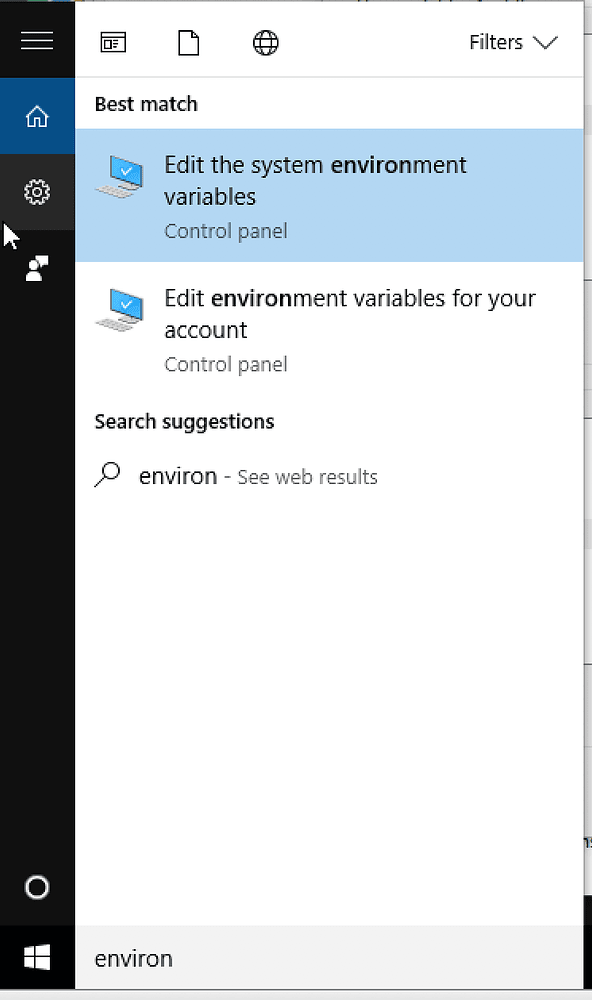
Type “environment” into the Windows search box. You should see a result like “Edit the system environment variables”.
-
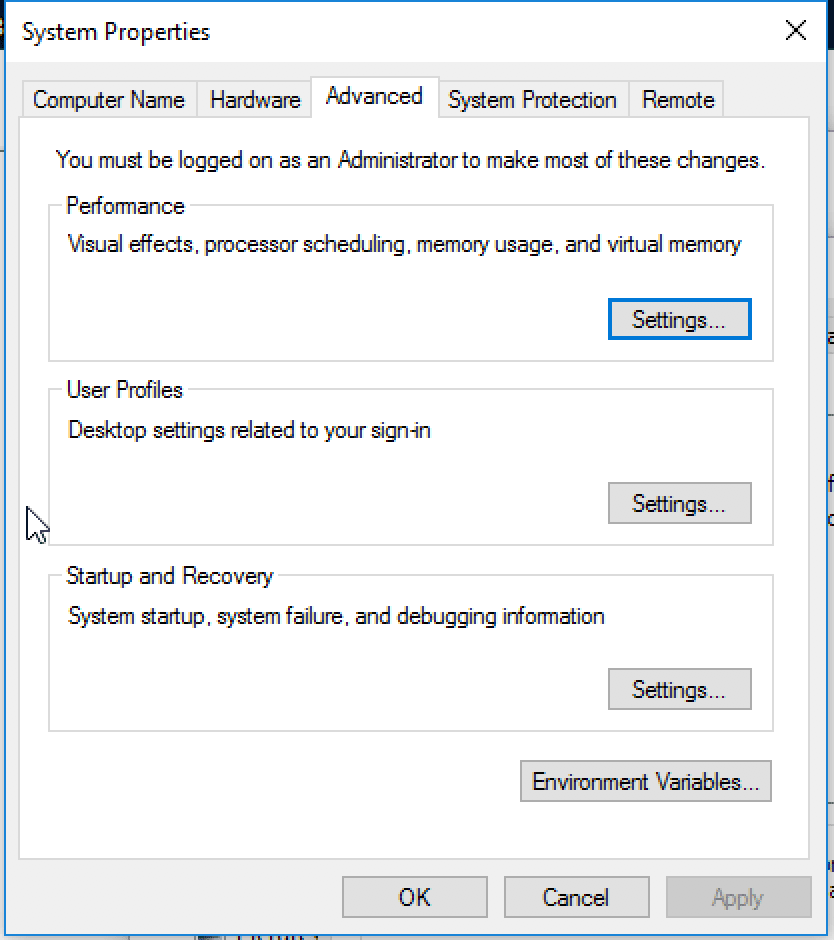
Click it to open the System Properties window.
-
Click Environment Variables….
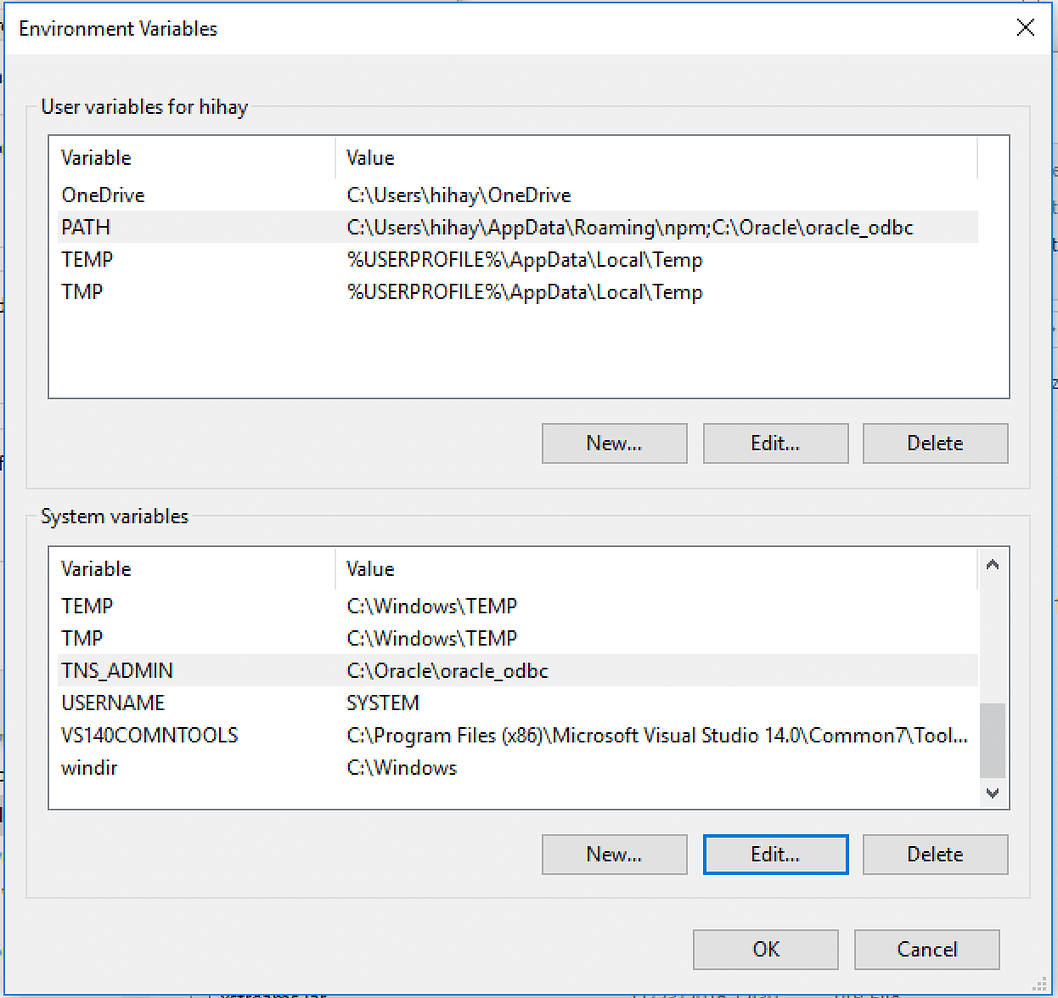
Update the PATH environment variable
In the User variables pane (upper section), select PATH and click Edit…. In the dialog that appears, click New and enter the Oracle Instant Client installation directory path.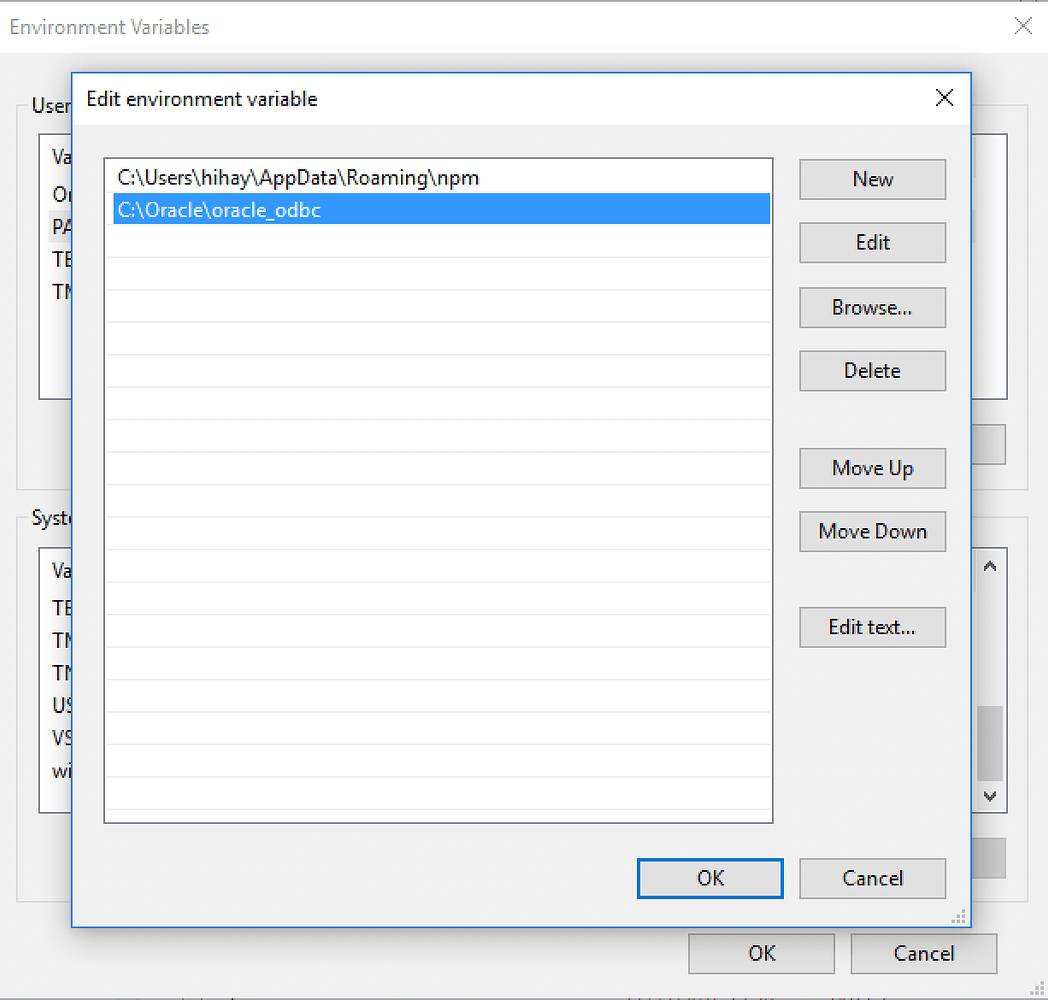
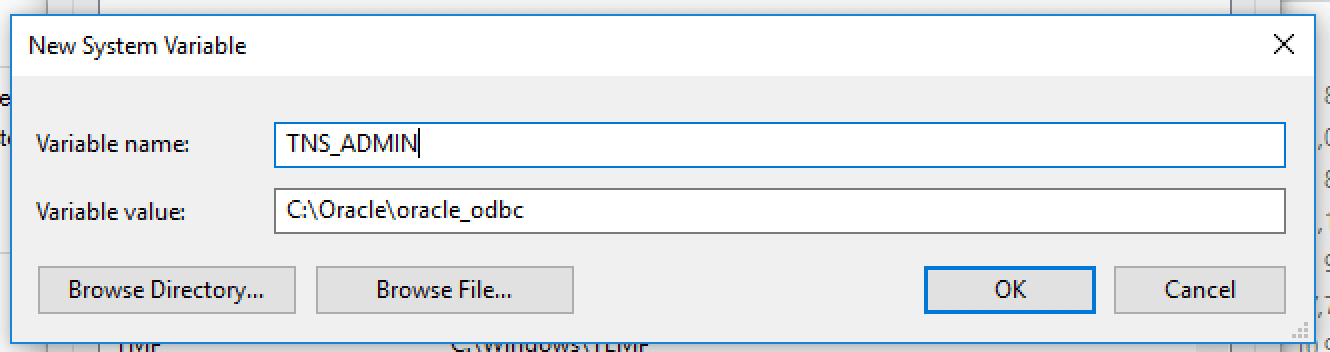
Add the TNS_ADMIN environment variable
In the System variables pane (lower section), click New, setTNS_ADMIN as the Variable name, and enter the Oracle Instant Client installation directory as the Variable value. Click OK to save the changes.
4. Create a connection in Exploratory
-
Start Exploratory, open a project, and select Data Connection from the project menu.
-
Click Add to create a new connection, select the Database tab, and choose Oracle. Make sure the ODBC driver you installed appears in the ODBC Driver for Oracle dropdown, and fill in your Oracle database details. Click Test Connection to make sure it works, then click Add to save the connection.