
Install
Install from System Settings
In Exploratory Desktop, choose your name at the bottom left of the screen, then choose System Settings in the menu that opens (1 and 2 in the picture).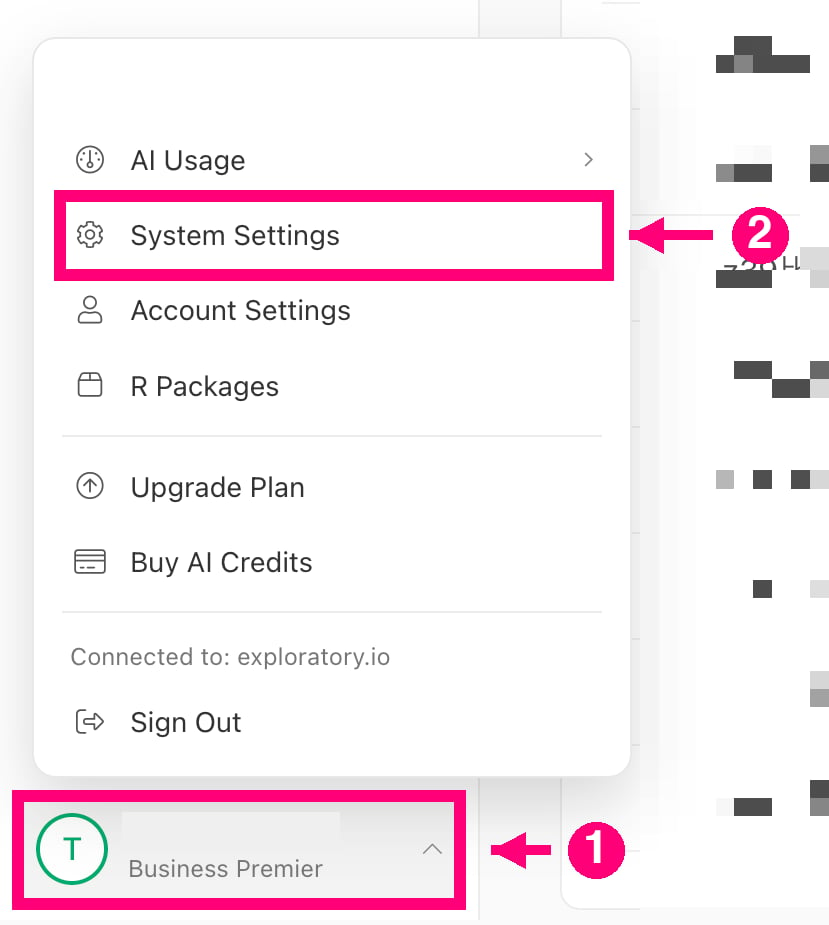
- In the menu on the left, choose MCP / CLI.
- Find the “Install the Exploratory Desktop plugin” card.
- Choose Install on the row of the AI tool you use.
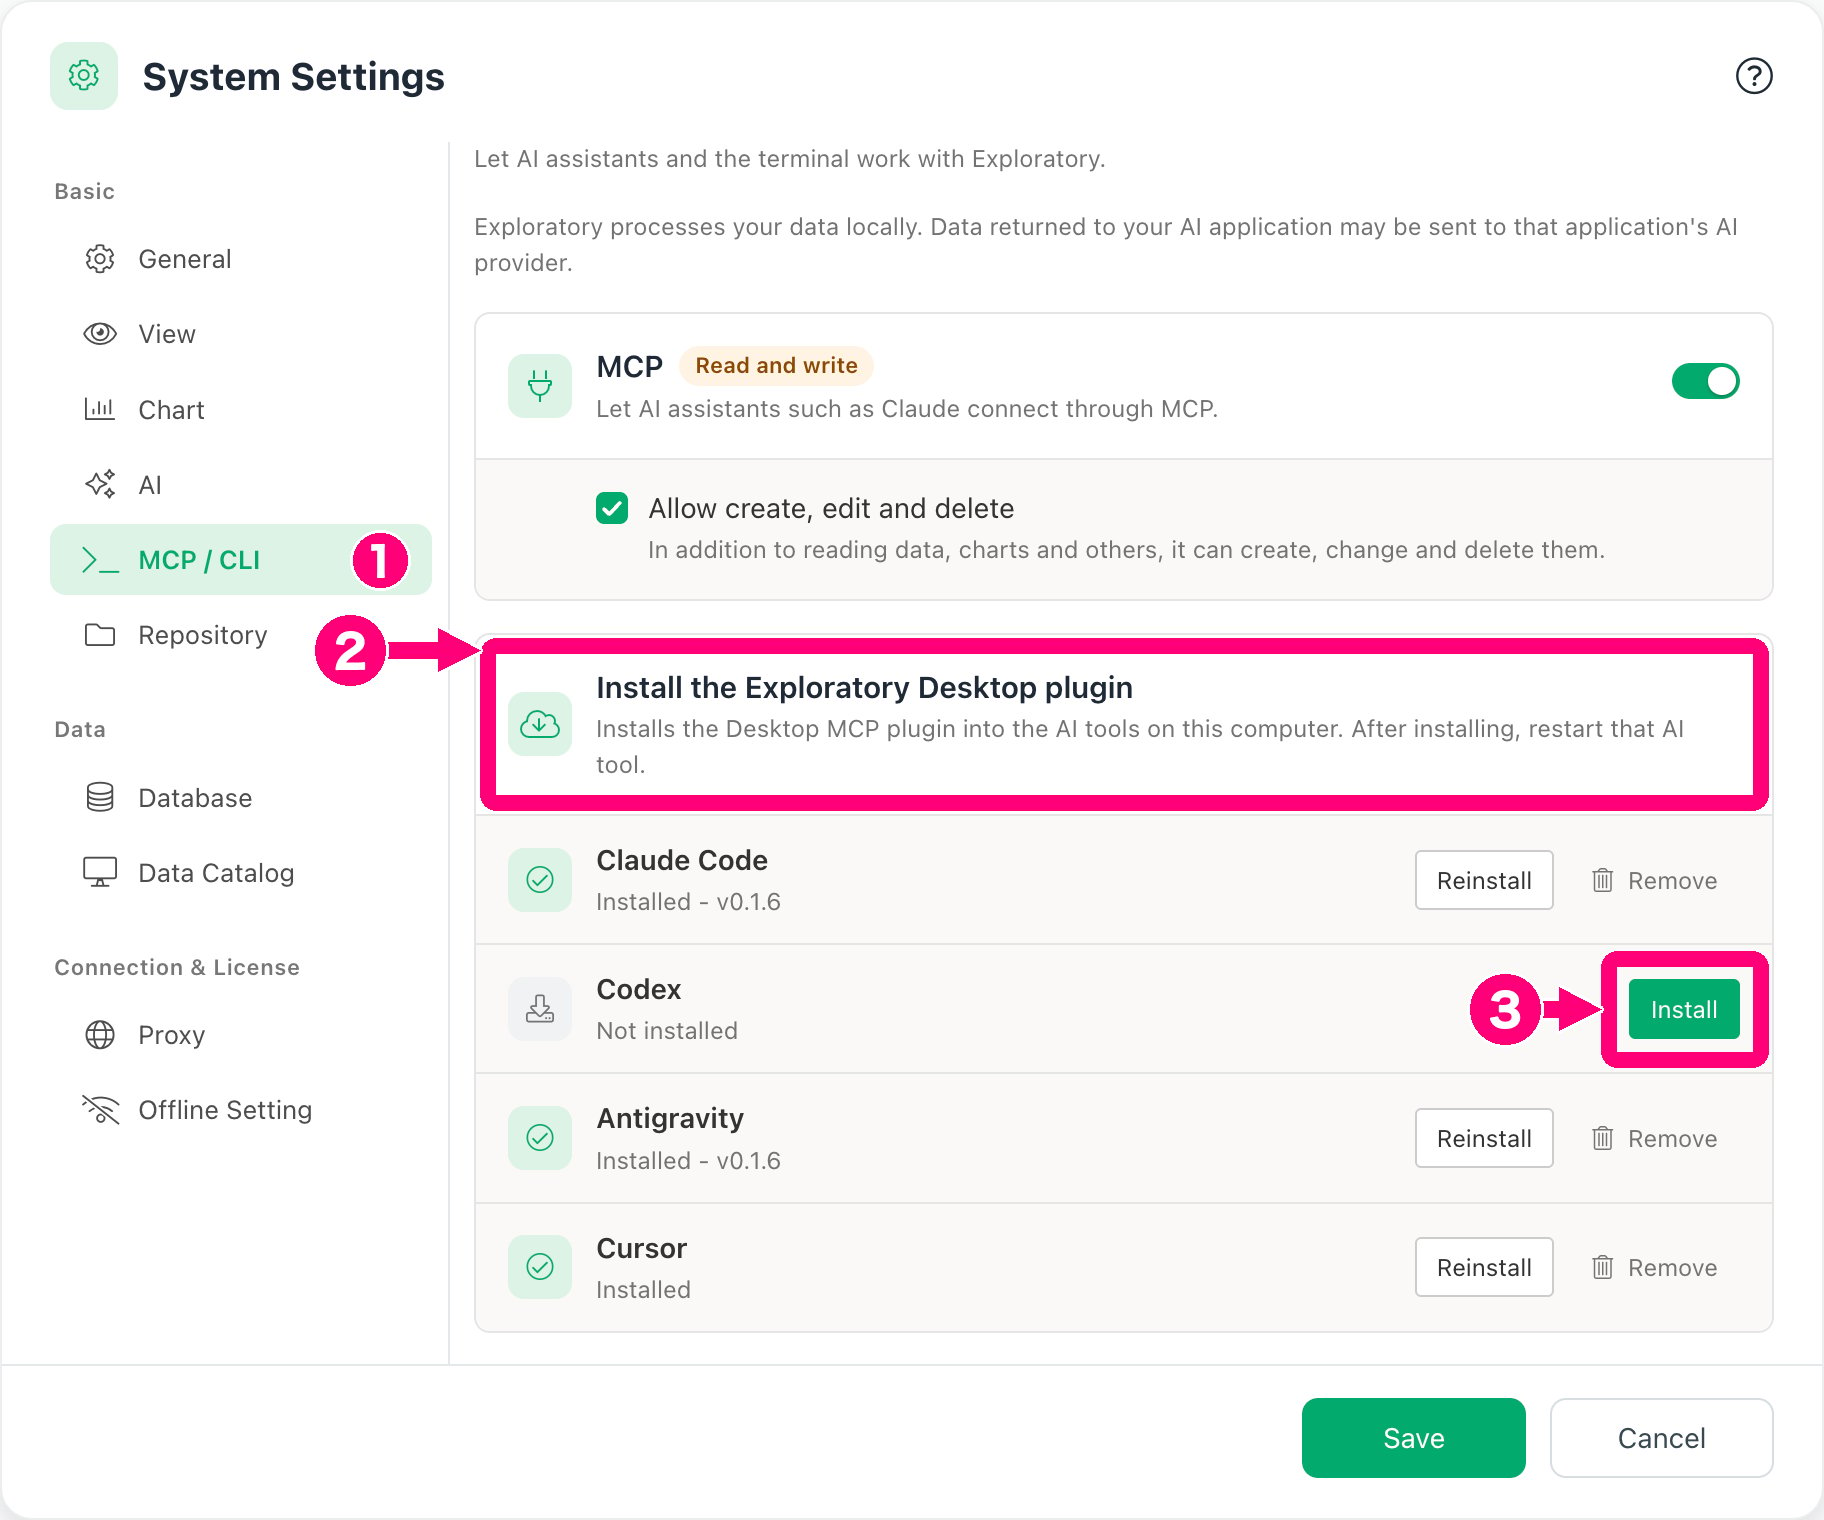
Installs the Desktop MCP plugin into the AI tools on this computer. After installing, restart that AI tool.The card lists Claude Code, Codex, Antigravity and Cursor. An AI tool that is not on this computer shows Not found on this computer. The command is added automatically when the app starts, so there is no step to register it. Next, on the same screen, do this.
- Turn on the MCP switch. It is off by default.
- Only when you want the AI to create or change charts, notes and other content, check Allow create, edit and delete. Without it, the AI can only read.
- Choose Save at the bottom of the screen.
Check it in the AI tool
- When the install ends, restart that AI tool.
- The first time an AI tool connects, Desktop shows a window titled “An AI tool is asking for your approval”. Choose Allow only for an app you started yourself. If you choose Don’t allow, see If something does not work.
- In Exploratory Desktop, open the project you want to use.
-
In the AI tool, ask this.
This works with Allow create, edit and delete off too. To try creating something, turn on Allow create, edit and delete and save, then ask for a chart instead, such as a bar chart of a column of your own data.
-
Check the connection.
- In Claude Code, open
/mcpand check that exploratory-desktop is connected. - In Codex, run
codex mcp listand check that exploratory-desktop is listed. - In Antigravity, check that the plugin appears under Customizations > Installed in the app.
- In Cursor, check that the Cursor row of the card shows “Installed - v” followed by the plugin version.
- In Claude Code, open
Differences between AI tools
The card works the same way, but what it installs differs a little.
Restart the AI tool after installing, whichever one it is.
The buttons on the card change with its state.
Choosing Remove opens a confirmation.
When the install fails
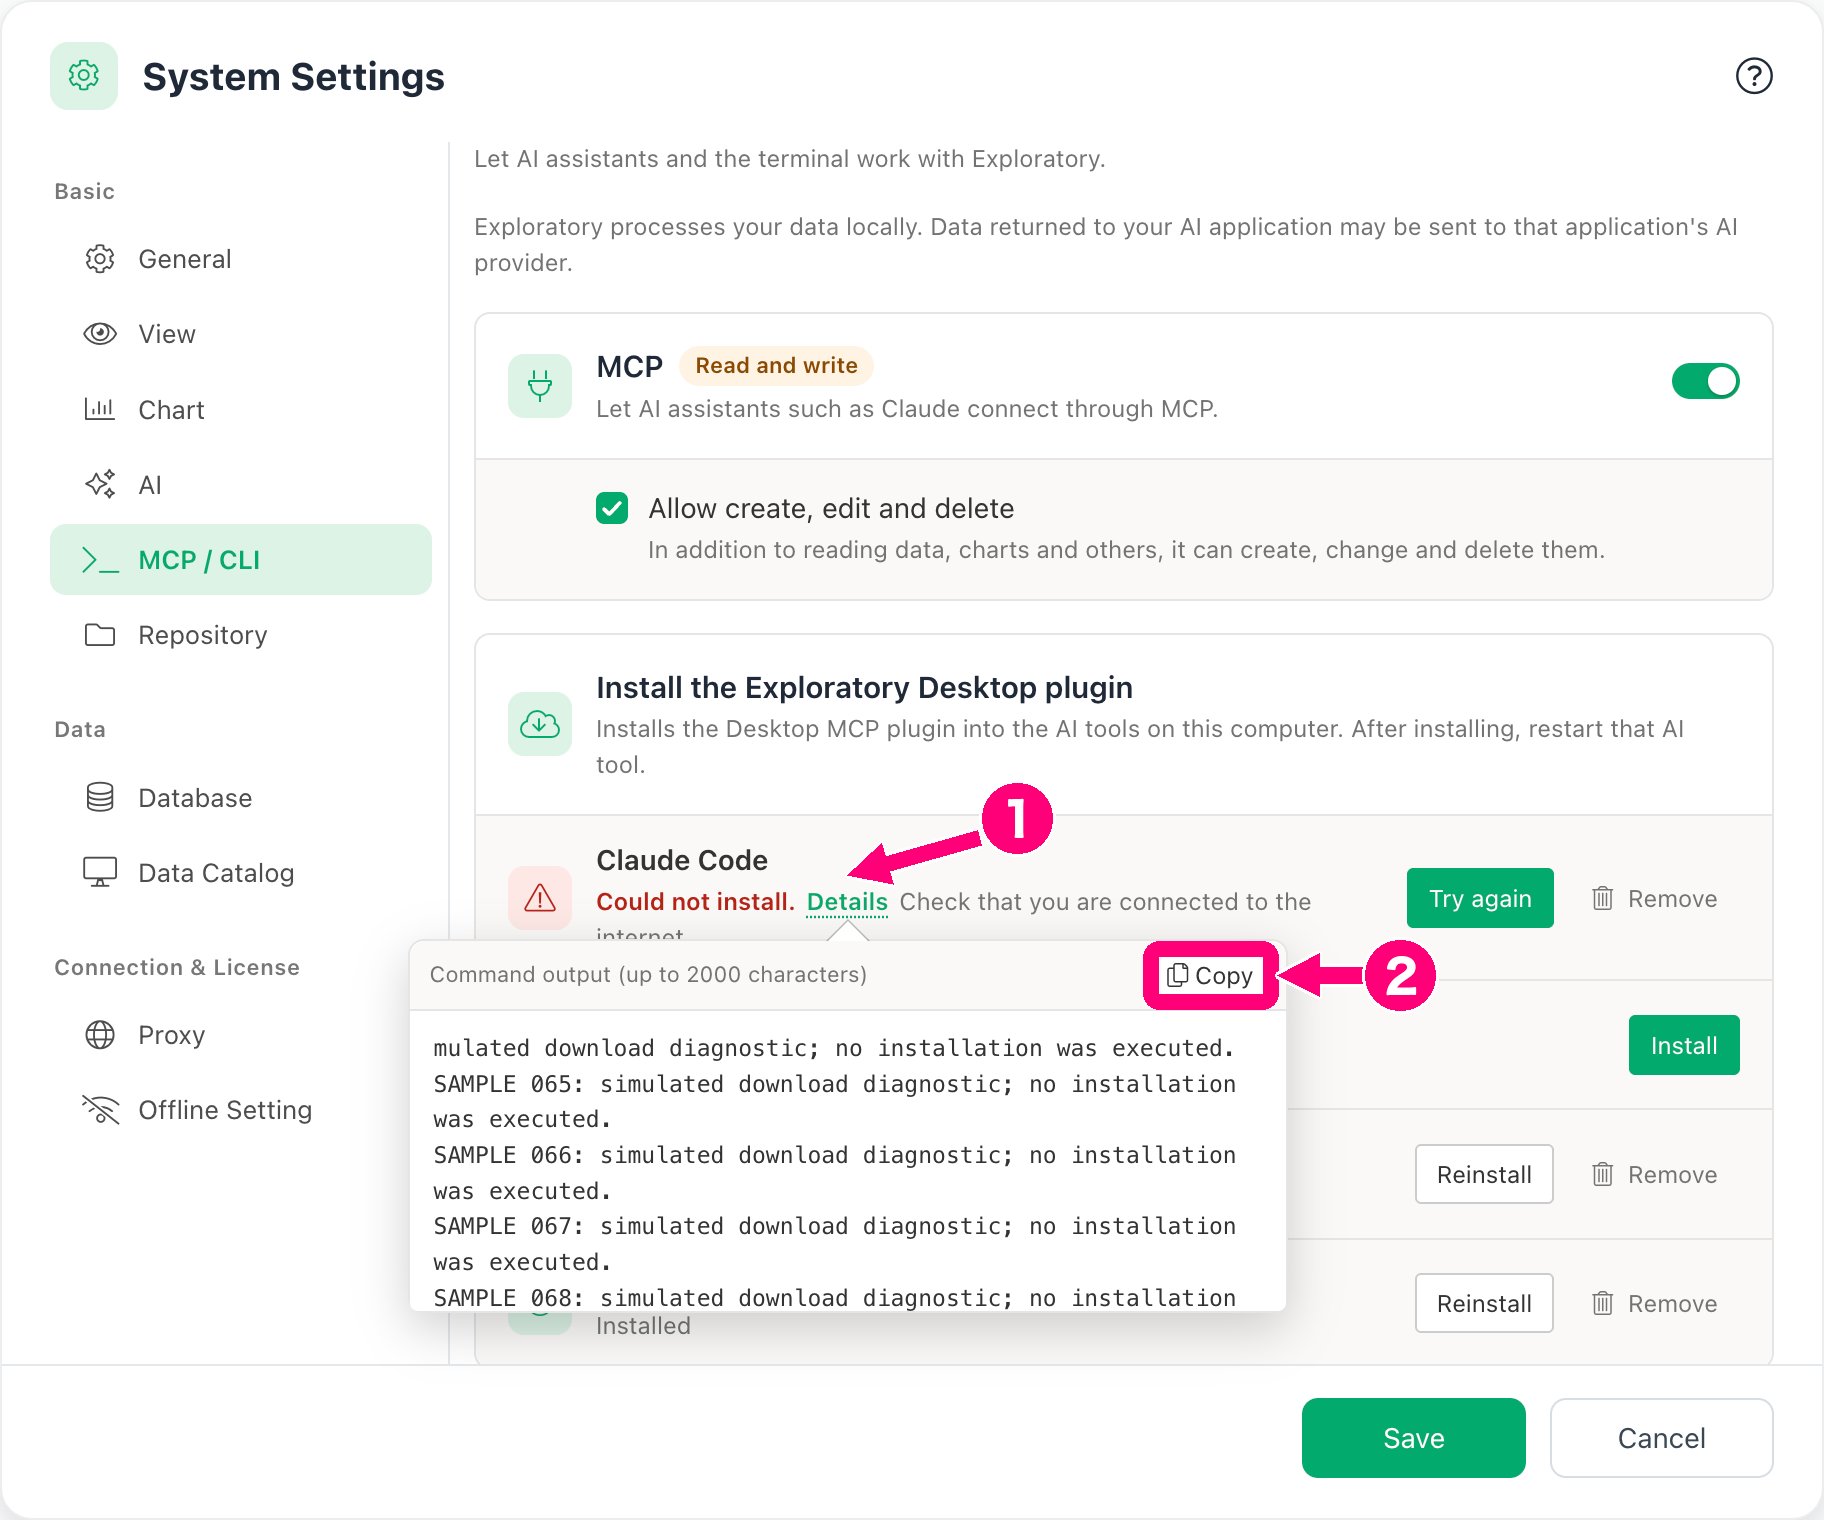
When an install fails, the second line of that AI tool’s row shows “Could not install.” in red. Details is right after it, then a sentence that gives the reason (for example “Check that you are connected to the internet.”), and a Try again button at the right of the row. When updating an installed plugin fails, a Remove button also appears to its right. Hold the mouse pointer over Details to see the output of the command that ran, in a pop-up. It shows up to the last 2,000 characters of the output. If it is long, you can scroll inside the pop-up vertically. The pop-up stays when you move the pointer into it. Click Details to keep it open. Copy at the top right copies the output. The image is an example of how the error details look when updating an installed plugin failed. The command output in the pop-up is a sample and differs from real output.- Hold the mouse pointer over Details.
- Choose Copy at the top right.
Install by hand
Use this when you do not use the card. The plugin is not in the official plugin directories. Add the repository exploratory-io/exploratory as a marketplace, then install the plugin exploratory. Run the commands in a terminal yourself, or ask an AI tool to run them. Claude CodeUpdate and remove
It depends on how you installed it.- Installed with the card (Claude Code, Codex, Antigravity, Cursor): choose Reinstall on the card to install the latest plugin again (this is also how you update). To remove it, choose Remove on the same card.
- Installed by hand (Claude Code, Codex, Antigravity): use the commands in the table below to update and remove. Cursor has no by-hand method; use the card.
The Desktop MCP stops when you quit Exploratory Desktop. Removing the plugin does not affect your Server MCP connection.